
Staining kitchen cabinets can be moderately challenging. The difficulty depends on your skills, the cabinet condition, and the stain type. Proper preparation, choice of stain, tools, and patience play vital roles. If you're inexperienced, consider professional help for a flawless finish.
A Guide on How to Stain Wood Kitchen Cabinets
Posted:
November 03, 2023
Categories:
Guides
Introduction
Stained RTA cabinets instantly add warmth and elegance to your kitchen, but do you know what goes into staining kitchen cabinets? If not, don't worry. We are here to help! This type of DIY project can feel daunting, but this step-by-step guide will lead you through staining wood cabinets.
How Do You Stain Kitchen Cabinets?
Step 1 - Stain Selection and Project Preparation
The first step in this process is to choose a stain. You will have to select a darker shade than the original shade of your RTA cabinets. which will make the room appear darker. However, it will create an inviting, cozy look and feel if done correctly.
Once you have chosen the shade of stain for cabinets, it is time to prep them for their transformation! To prepare the wood for staining and for the best application, you will need to start by removing any cabinet doors or drawers that have already been installed. You can skip this step if you still need to assemble your cabinets!
After that, you will want to prepare the surface of the wood for the stain. To do so, simply sand the surface of all the cabinets, making sure to use a light hand so as not to damage the wood. We recommend using 100 or 150-grit sandpaper on your cabinets; however, you can also use an electric sander at a low setting if you have one handy. Please note that you should always sand the wood in the direction of the natural wood grain.
Step 2 - Clean The Surfaces
After you have sanded the surface of the cabinets, you can move on to the next step! After sanding, thoroughly clean each cabinet door and drawer. Once everything has been cleaned, you can go in for a second round of sanding. The second time you sand, you can use a higher-grit sandpaper, such as 220-grit sandpaper.
Once that round of sanding is complete, apply a wood-specific conditioner to your cabinets, bringing out the natural shine of the wood species. When using the wood conditioner, follow the application steps for the specific conditioner you have purchased. Plus, let it sit until fully dry before moving on!
Step 3 - Apply Stain and Lock It In
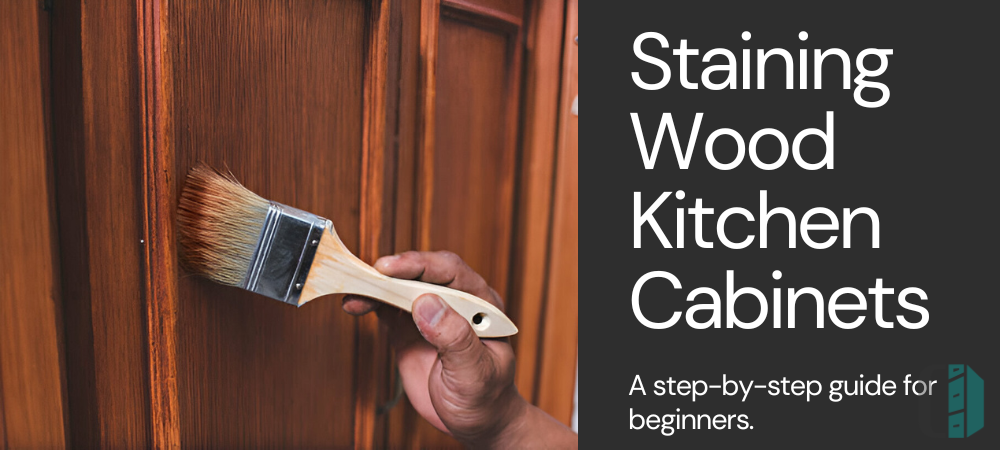
Once the above steps are done, you can stain the cabinets! When staining wood cabinets, work in sections, tackling the most significant sections first. Once the stain has been applied to these large sections of cabinet doors and drawers, use a soft rag to work the stain into the wood. This will make sure the stain is applied evenly and reaches any hard-to-reach nooks and crannies.
Furthermore, when staining kitchen cabinets, start with a small amount and add more as needed. The more stain that is applied, the more the wood will absorb, which could result in an uneven color distribution. We recommend using an oil-based stain for cabinets, as it is easier for the wood to absorb and penetrate deeper into the material than a water-based stain.
Step 4 - Lock in The Stain
Once you have finished staining kitchen cabinets, lock that in! To do so, apply a topcoat to seal in the stain. This will further the life of the stain, making sure they look fantastic for years to come!
Pro Tip: Apply two coats of the topcoat sealer for the best results. In addition to making the stain last longer on your cabinets, the topcoat protects against damage, such as scratches and dings that may pop up with regular use.
Why Shop with Cabinet Distribution?
At Cabinet Distribution, we aim to empower our customers with the knowledge and resources needed to craft the kitchen of their dreams, such as finding the best RTA kitchen cabinets. From kitchen design services to design inspiration and remodeling tips, we are with you every step. We take pride in offering high-quality cabinets crafted from premium materials at the best possible price. Plus, we provide lightning-fast shipping (in 3 business days) so you can start your dream kitchen remodel as soon as possible!
Our commitment to quality ensures that staining kitchen cabinets results in a stunning look and withstands the rigors of daily use. We recognize that every kitchen is unique. We can accommodate your requests for particular dimensions, storage solutions, or special finishes of cabinets. We offer Free Kitchen Design services and are proud to provide those interested with sample cabinet doors. This way, you can be 100% satisfied with your material choices and create a unique kitchen that fits your design style and lifestyle.
Final Thoughts
Staining kitchen cabinets is a fantastic way to transform your kitchen's aesthetic, adding warmth, character, and a touch of your unique style. Whether you're aiming for a rustic, modern, or traditional look, staining kitchen cabinets allow you to achieve the desired finish while preserving the natural beauty of the wood.
We've explored the essential steps of staining painted cabinets, from preparation and sanding to applying the stain and protective finish. By following these guidelines and taking your time, you can achieve professional-quality results that will make your kitchen the talk of the town!
Remember, staining painted cabinets is not just about enhancing their appearance; it's also about increasing their longevity and protecting them from wear and tear. With the right stain shade and finish, you can enjoy your beautiful cabinets without applying touch-ups or re-staining the wood for years.
So, whether you're embarking on a DIY project or seeking professional assistance, staining or refinishing oak cabinets is undoubtedly worth the effort. The result will be a kitchen that radiates charm and elegance and reflects your style. Happy staining, and may refinishing oak cabinets bring joy and functionality to your kitchen space for years to come!
Frequently Asked Questions
Is It Difficult To Stain Kitchen Cabinets?
Is Staining Kitchen Cabinets A Good Idea?
Staining kitchen cabinets are great for enhancing aesthetics, cost-effectiveness, customization, preservation, and increasing home value. However, it may not be suitable for severely damaged cabinets or if you desire a completely different style.
What Is The Best Stain For Kitchen Cabinets?
The best stain depends on the wood type, desired outcome, and personal preferences. Oil-based stains offer rich color and durability, while water-based stains are eco-friendly and dry faster. Gel stains are user-friendly; your choice between semi-transparent and solid stains depends on your preferred finish. Test or seek professional advice for the best results.
What is the best method to stain cabinets?
After the sanding process, apply a thin layer of wood conditioner. This step is often overlooked, but it's crucial as it helps the wood absorb the stain evenly, preventing blotches and streaks. Next, apply two coats of paint, allowing enough drying time between coats and keeping the coats thin. Once the cabinets are dry, use a sealant to lock them in.
Is it OK to stain cabinets without sanding?
Staining wood cabinets without sanding the surface is not recommended. It won't have the desired effect because the stain will not soak into the wood properly.
Is it necessary to apply sealant after staining?
Applying a sealant to your wood cabinets is vital after completing the staining process. The stain adds dimension and depth to the wood. However, the sealant protects it and ensures it lasts.
How many coats of stain do I need for cabinets?
The exact number of coats needed depends on the look you are going for, the shade of stain chosen, and the condition of the cabinets. On average, two coats of wood stain create an attractive look and highlight the natural wood grain.
How long should the stain stay on before wiping?
The stain shouldn't sit for long. Let it soak in for 5-10 minutes before removing any excess.
Why are my wood cabinets sticky after staining?
Suppose you find that your cabinets feel sticky after staining. You may have used too much wood stain or applied too thick coats. Thickly applied wood stains will not dry properly.