Step-by-Step Guide on Crafting DIY Shaker Cabinet Doors for Your Home
Introduction
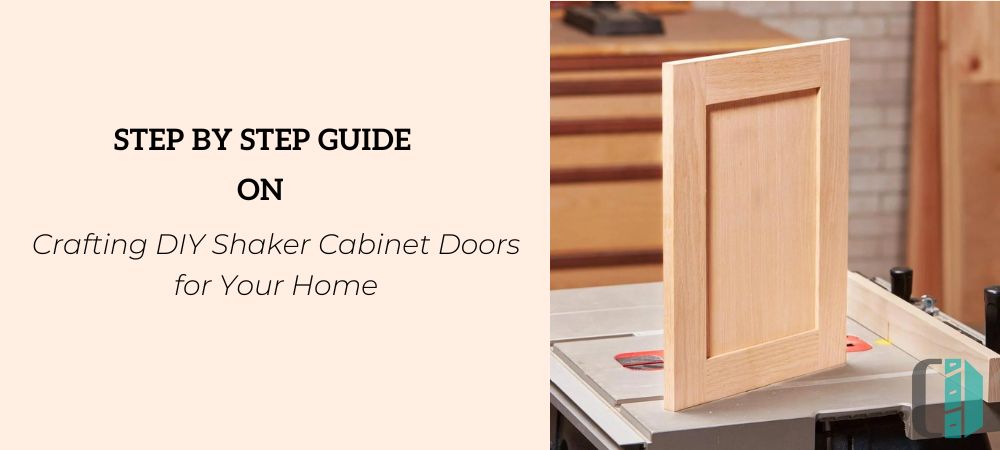
Shaker cabinets look fantastic in any kitchen or bathroom. With their simplicity and versatility, it’s no wonder that they’re the most popular cabinet style out there. What’s even better is that these cabinets are quite easy to build yourself. There aren’t many details to account for, just a center panel surrounded by 4 pieces of wood. And if you have the tools and the means, DIY shaker cabinet doors are a very fulfilling building project. Just think of the sense of accomplishment you’ll feel when you walk into your home and see shaker cabinet doors that you built with your own hands. Keep reading to learn how to build your own shaker cabinet doors.
The Materials
Before you start building your DIY shaker cabinet doors, you need to assemble your materials. To start, you’ll need a saw to cut your wood, a miter gauge to make sure everything is level, and a sharp blade. For your wood, you’ll want to stick to 1x3 or 1x4 boards for the frame and ¼ inch plywood for the panel. Don’t cut the wood to a narrower width because this can cause warping, which will throw off the look of your shaker cabinet doors.
Note: Have extra wood as test pieces to try out your saw before you cut the pieces of your DIY shaker cabinet door. Use these pieces first and make a note of the settings once you’ve gotten them right.
Now that we’ve covered the materials, we can get into building shaker cabinet doors:
Step #1: Measure Your Materials
You’ll need to assess how large you want your cabinets to be before you start building your shaker cabinet doors. You’ll need two stiles, the vertical parts of your cabinet frame, and two rails, the horizontal parts of your cabinet frame, as well as a center panel. To determine how long you need your stiles to be, take the desired height of your cabinet and add ⅛ of an inch. To determine how long you need your rails to be, take the width of two stiles and subtract that number from how wide you want your doors to be. You also need to add an extra ½ inch to these pieces, to account for the tenons you’ll add later on.
Step #2: Set Your Miter Gauges
Use two miter gauges to act as a sort of sled while you cut your wood on a table saw. Tie these two gauges to the fence and add a 24-inch-long hardwood ⅓ to give your wood a more accurate cut. You’ll also need to use a combination square to set the miter gauges at 90 degrees from the piece of wood you’re cutting.
Step #3: Cut Your Parts to Your Preferred Length
Decide how long you need the pieces of your shaker cabinet doors to be and begin cutting them to size. For this next portion you’ll need to use a stop block to keep your measurements precise. Take the wood that you’re using for your fence and cut a slot in it from the beginning to where your stop block is, then clamp your stop block to your fence. Next you’ll be pre cutting your stiles and rails. You accomplish this by taking the part you want to cut and placing it on the left side of your fence, cutting ¼ inch off of it on the right end, sliding this part until it touches your block, and cutting the left end. You can also trim the ends of your test pieces here.
Step #4: Make Marks to Determine What Goes Where
Mark the stiles and rails of your shaker cabinet door with a cabinet maker’s triangle so you can remember what goes where. You’ll want to place them in the orientation in which they’ll be on your door when you do this.
Step #5: Make a Cut for the Center Panel
Here you’ll begin to cut the groove that your center panel sits in. Start by marking the center of your pieces on the long side, going down the length of your stiles and rails. Next take your saw and adjust it to be slightly off the exact center of this line. Cut a little over ¼ inch deep into your piece along the length, following the line you drew.
Step #6: Widen This Cut
This time from the other side, cut along this line again. This will widen the gap enough for the center panel of your shaker cabinet door to fit comfortably in the groove. Repeat the last two steps for all of your rails and stiles.
Step #7: Prepare to Cut Tenons
Tenons are the rectangular pegs on the ends of your stiles. They slot into the groove you cut on the rail, called a mortise. To prepare to cut your tenons, locate the slots in your saw’s fence and clamp your block ¼ inch away from it. Next, take either a rail or a stile that you’ve cut a groove in and put it next to the blade, and adjust the blade so that it makes a cut slightly lower than the groove.
Step #8: Cut Tenons on Your Wood
Make cuts on your wood that are overlying on one side, then flip the piece over and repeat the process on the other side. Make sure this peg fits in the groove and adjust accordingly if it doesn’t.
Step #10: Move Your Saw’s Fence
Now you need to prepare to cut the center panel of your shaker cabinet doors. To do this, make the length of your blade from your saw’s fence the same length as your shaker cabinet door’s rail.
Step #11: Cut Your Panel to Your Preferred Width
Cut the center panel to the size it needs to be, ensuring that the best looking side of your wood is facing up. This is the part that will show on your shaker cabinet doors.
Step #12: Determine Your Panel’s Needed Length
Now that you’ve figured out how wide your panel needs to be, you need to make sure it’ll fit. Take 3 sides of your shaker cabinet door and measure how long it is between the two tenons. This is how long your center panel needs to be.
Step #13: Cut Your Panel to Your Preferred Length
Before you cut your panel, set your saw’s fence to 1/16 of an inch less than the length you measured between your tenons. After you do this, cut the panel for your shaker cabinet doors.
Step #14: Put Glue in the Groove
Even though you’ve cut your parts to fit together, a little glue will ensure that your shaker cabinet doors stay together for years to come. Apply the glue in the grooves of your stiles and rails.
Step #15: Fit the Panel Into the Groove
Now comes the assembly of your DIY shaker cabinet doors. Take one stile and one rail, apply glue to the grooves and the tenon, put them together, put the panel in the middle, and repeat this process with the other stile and rail.
Step #16: Clamp the Door to Dry
Your door now needs to dry, so clamp it and let it set for at least an hour. Set up your clamps to hold the door together at the top and the bottom of your door. Before the glue totally dries, wipe up the excess using a damp rag and a putty knife. When you’re sure the glue is dry, trim any uneven edges off of your door.
Step #17: Add Hinges to Your Door
Now that you’ve completed your shaker cabinet door, you need to add hinges to complete it. Find the best hinges for your door and attach them where they need to go.
Conclusion
And there you have it. You now know how to build your very own shaker style cabinets. You now know about measuring your parts, setting your saw, and what you need to do to make your cabinet doors look their best. It may seem like a complicated, involved process, but once you know what you’re doing you’ll be building plenty of your own shaker style cabinet doors in no time. The best part about knowing how to build your own cabinet doors? You have much more freedom to customize your cabinets. If you want to make them a particular color, customize your shaker cabinet by adding trim to flat cabinet doors, anything you want to do you can do it. That will make your next DIY project that much more impressive, and give you a nice sense of accomplishment. If you want readymade shaker cabinets, we offer two fantastic options: our exquisite white shaker cabinets and the rich allure of espresso shaker cabinets. Explore our selection and elevate your space effortlessly.