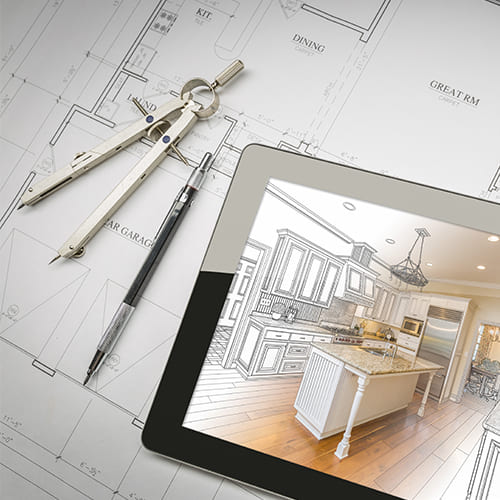
A Step By Step Guide on How To Install RTA Cabinets

Introduction
Whether you're a seasoned DIY enthusiast or a first-time home improver, our detailed instructions and insider tips will empower you to elevate your living space with style and functionality with ready-to-assemble cabinets!
From the initial measurements and stud location transfers to seamlessly securing cabinets, we've got you covered at every step. Join us as we explore the intricacies of cabinet installation, offering insights that will turn your vision into a reality.
Get ready to unlock the DIY magic and witness the transformation of your home as we guide you through the installation of RTA cabinets. Let's embark on this exciting adventure together!
Cabinet Installation Tools Needed


Before you begin the process of assembling and installing your RTA cabinets, you will need to secure a few cabinet installation tools.
Here is what you will need:
- A Level
- Tape Measure
- Stud Finder
- Hammer and Finishing Nails
- Pencil
- Clamps
- Drill or Screwdriver
- Drill Bits
Armed with these tools, you will be ready to tackle the RTA cabinet installation process with ease! But how do you install kitchen base cabinets and upper cabinets properly?
How to Install Kitchen Cabinets for Beginners
- Collect Measurements and Mark Measurements.
- Utilize a Ledger Board.
- Check the Cabinets You Ordered.
- Hang Up Wall Cabinets.
- Install Base Cabinets
- Add Cabinet Door Finishes


First and foremost, you need to use a tape measure to make note of measurements. It is recommended to use a pencil to mark measurements onto the wall, this way you can easily remove them when you no longer need them.
When starting the process, be sure to measure and mark the highest point of the floor where your RTA cabinets will sit. It is recommended that you start measuring the perimeter of the kitchen horizontally and then vertically, from left to right. This simplifies the process greatly! Make sure that you note any odd angles or features in the space, as these will be crucial to take into account for fitting cabinetry, trim, etc.
After that, draw another line at the highest point where the cabinets will sit, except this one will be about 20 inches higher than the first line one you drew. Next, reference the diagram of your kitchen design that you have drawn and mark where all the ready-to-assemble cabinets need to be placed within the space.
Lastly, use the tape measure to measure the electrical outlets, plumbing, and wiring locations. When it comes to electrical outlets, precise measurements help determine the strategic placement of appliance sockets, ensuring accessibility and avoiding clutter. Plumbing measurements are crucial for positioning sink and faucet fixtures, guaranteeing proper alignment with the cabinets and optimizing functionality.
Additionally, accurate measurements for wiring locations are essential to seamlessly accommodate lighting fixtures, under-cabinet lighting, and other electrical elements. These meticulous measurements contribute to the kitchen's overall efficiency and prevent any issues during the installation process, ensuring that the cabinets are seamlessly integrated with the necessary utilities for a well-designed and fully functional kitchen space.

Pro tip! Use a level to determine whether the floors are level prior to installing your cabinets.


Second, use a ledger board to support the weight of the RTA cabinets as you install them. This is especially helpful if you have not done this before and are working alone or with a small team. A ledger board is essentially a horizontal support structure, often a piece of lumber securely attached to the wall, serving as a guide for the placement and leveling of cabinets. This board provides a stable reference point, facilitating the alignment of cabinets at a consistent height and ensuring that they are securely anchored to the wall.
Utilizing a ledger board during RTA cabinet installation helps maintain uniformity and eliminates the risk of cabinets sagging or tilting over time. It is a temporary support structure, allowing for precise adjustments before the cabinets are permanently fixed. The ledger board is crucial in achieving a professional and polished look for the finished installation, providing a solid foundation for the cabinets to rest upon. Attach the wooden board to the wall where the cabinets will go. Then, use the level to keep it straight as you drill the cabinets into the walls.


Prior to installing your ready-to-assemble cabinets, be sure to check them thoroughly for any damage that may have occurred during transit. Check for any dents, scratches, or blemishes that might have occurred during manufacturing, transportation, or storage. Verify that all pieces align correctly and that the cabinet doors open and close smoothly. Inspecting the finish for consistency and quality is essential, ensuring there are no irregularities or discolorations.
Addressing imperfections before installation allows for timely replacements or repairs, preventing potential issues from becoming more challenging to rectify once the cabinets are in place. This meticulous pre-installation inspection ensures that the RTA kitchen cabinets meet aesthetic standards and function optimally, providing a durable and visually pleasing foundation for the kitchen space. Be sure you also make sure that the cabinets fit the kitchen diagram properly as well.


Prepare the cabinets by marking left and right cabinet doors, as to not mix them up, and label drawers based on where they will be placed. Start hanging the corner cabinets first. Use the stud finder and mark any studs in the wall prior to drilling any screws into the wall. Lift the cabinet into place and then use the ledger board to be sure it is hung straight.
For the subsequent cabinet, the procedure varies slightly. Transfer the stud locations onto the hanging strips at the back, pre-drill, and then elevate it into position. Employ clamps to firmly secure it, ensuring it is plumb and level with the initial cabinet. Adjust if necessary, and re-clamp as needed. Introduce shims behind to achieve evenness and secure it in place with screws.
Next, fasten the cabinet to its adjacent counterpart. Place one screw at the top and bottom on both the front and back of the stile (the vertical piece on the inside or face of the cabinet frame).
Repeat these steps for each wall cabinet. Consider attaching two cabinets of the same height while still on the ground when situating them. Employ clamps, validate the level, and ensure uniformity between the cabinets. Repeat this process for the rest of the RTA cabinets and then remove the ledger board.
Pro tip! Start screwing in the top ones before the bottom ones.


Once you have finished the uppers, move onto the base cabinets. Just as with the uppers, start installing the corner cabinets first. Begin by pre-drilling holes through the top back framing piece of the cabinet and securely fasten it in place. Double-check the level once the cabinet is firmly secured.
After installing the first cabinet, position the subsequent cabinet in place. Shim will achieve a level surface and clamp them together. Adjust for uniformity, using shims along the back as needed to align the faces of each cabinet perfectly. Secure the cabinets together along the stile using screws, as done with the wall cabinets. Proceed to pre-drill along the framing piece and fasten the cabinet securely. Reassess for level. Repeat these steps for each cabinet in your installation sequence.


When you have finished installing all the ready-to-assemble cabinets, it is time to add finishing touches! Install the toe-kick boards by fitting them into place making necessary cuts as required. Carefully nail them securely in place. In the case of a real wood toe-kick, take preventive measures by pre-drilling a small hole (without penetrating all the way through) to minimize the risk of wood splitting.
Occasionally, variations in floor levels may result in gaps between the toe-kick and the floor. To address this issue, incorporate a shoe or scribe molding (trim pieces) at the bottom of the toe-kick where it meets the floor. Subsequently, reattach the doors and drawers to complete the cabinet installation process.
Conclusion
Successfully installing ready-to-assemble (RTA) cabinets is a rewarding journey that transforms your space with functionality and style. By following our comprehensive step-by-step guide, you've navigated through the intricacies of cabinet installation, from meticulous measurements and stud location transfers to securing cabinets together seamlessly.
Embarking on a project like this enhances your living space and empowers you with newfound skills and confidence in tackling home improvement tasks. As you stand back and admire the professionally installed cabinets, take pride that you've played a hands-on role in creating a space that reflects your style and meets your practical needs.
Remember, the journey doesn't end here. Whether sharing your success with friends, exploring additional home improvement projects, or simply reveling in the satisfaction of a job well done, your RTA cabinet installation is a significant accomplishment. Cheers to your DIY prowess and the transformative power of a well-crafted home!